Table of Contents
Introduction
In this post, we will see how to create a Blazor loading spinner component when there is a delay in fetching. Creating a loading spinner component in Blazor is quite simple.
Take a look at the finished Blazor loading spinner in a Blazor Web App.
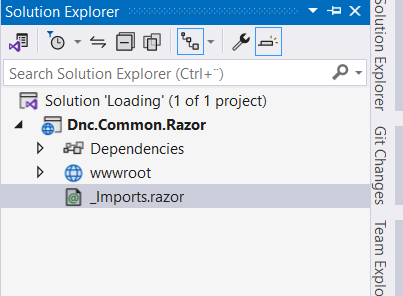
Creating a Loading Solution and adding a Razor class library project
- Open Visual Studio 2022 and click the Create a new project button.
- Select the Razor Class library project and click the Next button.
- Enter Dnc.Common.Razor in the Project name textbox and Loading in the Solution name and click the Next button.
- Select .NET 8.0 as the version of the Framework to use and click the Create button.

Creating the DncWrapper component
A wrapper component is a component that encapsulates other components or elements within itself, There are many uses for this encapsulation, Including extra features, altering behavior, or simply altering the appearance of the encased content.
We can add more functionality to the wrapper component as we did in the next post creating a blazor toast component using c# only, html and css.
The DncWrapper component will be responsible for maintaining the functionality of the blazor loading spinner.
- Right-click the
CS.Common.Razorproject and add a new project folder called Wrapper - Right-click the Wrapper folder and add a class that derives from
ComponentBasenamedDncWrapperComponent
namespace Dnc.Common.Razor.Wrapper
{
    public class DncWrapperComponent:ComponentBase
    {
        [Parameter]
        public RenderFragment ChildContent { get; set; }
        public bool Loading { get; private set; }

        private CancellationTokenSource cancellationTokenSource;
        public async Task<T> AwaitTask<T>(Task<T> task)
        {
            SetLoading(true);

            try
            {
                cancellationTokenSource = new CancellationTokenSource();
                return await task.WaitAsync(cancellationTokenSource.Token);
            }
            catch (TaskCanceledException e)
            {
                e.Data.Add("CanceledTask", "true");
                throw;
            }
            finally
            {
                SetLoading(false);
                cancellationTokenSource = null;
            }
        }
        public void SetLoading(bool loadoing)
        {
            Loading = loadoing;
            StateHasChanged();
        }
    }
}
There are two methods in DncWrapperComponent that are publicly accessible.
The SetLoading method is responsible for setting the Loading property in the component and calling the StateHasChanged method to notify the component that its state has changed , which causes the component to be re-rendered.
The AwaitTask<T>(Task<T> task) method receives a Task object as a parameter, sets the Loading property to true by calling the SetLoading method, and calls the WaitAsync method on the task object, which either completes with the result of the task it’s invoked on or throws a TaskCancelledException if the task is cancelled when the cancellation token is set to cancelled state.
Creating the DncWrapper Razor markup
Right-click the Wrapper folder and add a Razor component that derives from DncWrapperComponent class named DncWrapperComponent
@inherits DncWrapperComponent

<div class="dnc-wrapper">
    <div class="loading @(Loading ? "show" : "")">
        @if (Loading)
        {
            <div class="dnc-wrapper-spin fa-x3 d-flex justify-content-center align-items-center">
                <div>
                    <i class="fas fa-circle-notch fa-spin"></i>
                    <div>
                        <span>Loading...</span>
                    </div>
                </div>

            </div>
        }
    </div>

    <CascadingValue Value="this">
        @ChildContent
    </CascadingValue>
</div>
The spinner is only rendered if Loading property is true by using an @if directive, otherwise the content is rendered, and the DncWrapperComponent component instance is passed as a complex type to all descendent components.
Descendant components can then perform actions against the instance using its methods and bind to its properties.
We use fontawesome’s spinner classes to display a loading spinner with custom CSS classes as shown in the next section.
Also read https://dotnetcoder.com/dependency-injection-in-asp-net-core/
Creating the styles
Right-click the Wrapper folder and add a style sheets file named DncWrapper.razor.css
.dnc-wrapper {
    position: relative;
    min-height: 50rem;
}

.dnc-wrapper > div.loading {
    z-index: 1001;
    width: 100%;
    height: 0px;
    position: absolute;
    opacity: 0;
    transition: opacity 0.5s;
    text-align: center;
    pointer-events: none;
}

.dnc-wrapper > div.show {
    height: 100%;
    opacity: 1;
    backdrop-filter: blur(5px);
    width: 100%;
    background-color: rgba(255,255,255, 0.7);
}

.dnc-wrapper-spin {
    height: 100%;
    max-height: 60vh;
    margin-top: -1rem;
}

.dnc-wrapper-spin div span {
    padding-left: 0.8rem;
    font-size: 1rem;
    letter-spacing: 0.1rem;
    color: #666 !important;
}

div.loading .fa-spin {
    font-size: 5rem !important;
    color: #b1b1b1 !important;
}
Creating a Blazor Web App
1. Right-click the Loading solution and select the Add, New Project option from the menu.
2. Select the Blazor Web App project template and click the Next button.
3. Name the project Dnc.Loading.WebApp and click the Next button.
4. Select .NET 8.0 as the version of the Framework and Server in the Interactive render mode and click the Create button .
5. Right-click the Dnc.Loading.WebAppproject and select the Add, Project Reference option from the menu and check the Dnc.Common.Razorcheckbox and click the OK button.
6. Update the _Imports.razor file
@using Dnc.Common.Razor.Wrapper7. Include the bootstrap and fontawesome links in the App.razor file, as shown below.
<!DOCTYPE html>
<html lang="en">
<head>
    // Removed code for brevity
    <link rel="stylesheet" href="https://cdnjs.cloudflare.com/ajax/libs/font-awesome/6.5.2/css/fontawesome.min.css"/>
    <link rel="stylesheet" href="https://cdn.jsdelivr.net/npm/bootstrap@5.3.2/dist/css/bootstrap.min.css">
    <script src="https://cdnjs.cloudflare.com/ajax/libs/font-awesome/6.5.2/js/all.min.js"></script>
    <HeadOutlet @rendermode="new InteractiveServerRenderMode(prerender:false)" />
</head>

<body>
    <Routes @rendermode="new InteractiveServerRenderMode(prerender:false)" />
    <script src="_framework/blazor.web.js"></script>
</body>
</html>
Notice that we disabled the pre-render mode, so the OnInitializedAsync will only be triggered once.
Using the DncWrapper that holds the Blazor loading spinner in the Blazor Web App
In this section we will learn how to use our custom Blazor loading spinner in the Blazor application.
1. Encapsulate the MainLayout.razor component with the DncWrapper component, which holds the Blazor loading spinner functionalities, and an instance of it is passed to all descendent components to perform actions against the instance using its methods .
@inherits LayoutComponentBase
<DncWrapper>
    <div class="container">
        @Body
    </div>
</DncWrapper>

// Removed code for brevity
2.Right-click the Pages folder and add a class that derives from ComponentBase named EmployeesComponent
namespace Dnc.Loading.WebApp.Components.Pages
{
    public class EmployeesComponent : ComponentBase
    {
        [CascadingParameter] protected
        DncWrapper DncWrapper { get; set; }


        protected List<Employee> Employees = null;
        protected override async Task OnInitializedAsync()
        {
            Employees = await DncWrapper.AwaitTask(GetEmployees());
        }

        private async Task<List<Employee>> GetEmployees()
        {
            await Task.Delay(3000);
            var json = File.ReadAllText(@"./Data/employees.json");
            return JsonSerializer.Deserialize<List<Employee>>(json, options: new JsonSerializerOptions { PropertyNameCaseInsensitive = true });
        }
    }

    public partial class Employee
    {
        public int Id { get; set; }
        public string Name { get; set; }
        public int Age { get; set; }
        public string Gender { get; set; }
        public string Designation { get; set; }
        public string Department { get; set; }
    }
}
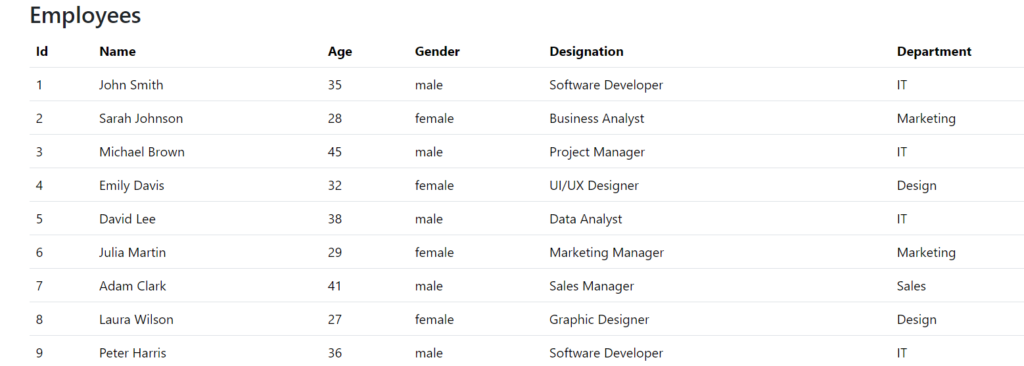
3.Run the application, and navigate to the /employees page, and observe the Blazor loading spinner that will be displayed for three seconds due to a delay in fetching data.

After completing the task the Blazor loading spinner disappears, and the data is displayed on the page.

Conclusion
In this post we created a Blazor loading spinner that can be used in your different projects. We started by creating a wrapper component that encapsulates the Body property in the MainLayout component, which provides the Blazor loading spinner functionality to the encased content.
The code for the Blazor loading spinner can be found Here.
Also read https://dotnetcoder.com/azure-service-bus-queue-trigger-azure-function/
Enjoy This Blog?
Discover more from Dot Net Coder
Subscribe to get the latest posts sent to your email.


